

So we are now one week on from the Space Marine 30th Anniversary, but while every one was focused on the fancy new model, and the new Crimson Slaughter Supplement, the Black Legion one slid under the radar ... but not my radar!
So today I am going to embark on giving you a run down of the rules and whether I feel these formations are any good to improve the poor old Chaos Codex. To explain, I will am going to explain the rules for each formation and i'll give you my opinion on whether it is worth taking in your army or not ... So lets get started!
The Bringers of Despair
Units
Abaddon the Despoiler
1 Unit of Chaos Terminators
Rules
Without Equal: Chaos Terminators that are part of this formation (including the Terminator Champion) have a Weapon Skill and Ballistic Skill of 5 rather than 4.
The Despoiler's Guard: While Abaddon the Despoiler is joined to the unit of Chaos Terminators from this formation, you can re-roll one Look Out, Sir roll for him in each phase.
Review
Right lets look at this closely, because when I first looked at this I was disappointed, after all this is the only formation with the mighty Abaddon the Despoiler in it. But Terminators that are hitting Space Marines on 3+ in combat as well as when shooting, cannot be played down!
The re-roll for the look out sir is handy, but then again Abaddon is Eternal Warrior.
Overall, I would have to say this is a good formation, and if you are going to take Abaddon then I see no down side to taking this.
Judgement: Glancing Hit!
The Chosen of Abaddon
Units
1-4 Chaos Lords or Sorcerers (In any combination)
1 unit of Chosen or Chaos Terminators for each Lord or Socerer
Rules
Exalted Champions: During deployment, each Chaos Lord and Sorcerer from this Formation must join one of the units of Chosen or Chaos Terminators. Only one character can join each unit in this way, and they cannot leave these units during the course of the battle. As long as the character is on the battlefield, his unit has the fearless special rule.
Blessed by the Chaos Gods: Before deployment, roll on the Chaos Boon table for each Chaos Lord and Sorcerer in this formation, re-rolling any results of Spawnhood or Dark Apotheosis. The result lasts for the entire game.
Review
This could potentially be a very expensive formation! In my experience, people do not often take more than 1 or 2 chosen units. With the additional rules that this formation gives you, to me does not give anyone a reason to take more than one unit and if that is the case, take Abaddon and the The Bringers of Despair Formation.
Judgement: Miss!
The Hounds of Abaddon
Units
1 Chaos Lord
1-3 units of Khorne Berserkers
1-3 units Chaos Space Marines
1-3 units of Raptor, Warp Talons or Chaos Bikers (in any combination)
(All units in this formation must take the Mark of Khorne but at no additional cost)
Rules
Let Slip the Hounds: Once per game, at the start of any of your turns after the first, you can declare a massed assault. For the duration of that turn, units from this Formation can charge in the assault phase even is they have made a run move in the same turn.
Khorne's Favour: If a unit from this Formation makes a successful charge and the total rolled for its charge range in 8 or more (before modifiers) add 1 to the Strength of its models until the end of the assault phase.
Review
The only chance I have had to test this formation was sadly against an army of dreadnoughts. (I lost obviously!)
That being said I like this formation. I chose to use Warp Talons (Even if G kept forgetting they are not Raptors!) 5 attacks on the charge re-rolling failed wounds at potentially Strength 5 is pretty tasty.
I think the potential to run and charge on one turn is useful, but you just have to be careful not to waste it, its only once a game! But for me that change of the +1 strength is more than useful, especially when you are not paying for your mark.
Judgement: Penetrating Hit!
Daemon Engine Pack
Units
1 Warpsmith
1-2 Forgefiend(s) or Maulerfiend(s) (In any combination)
Rules
Hunting Pack: After deployment, but before the first turn, nominate one enemy character. All Forgefiends and Maulerfiends from this formation have preferred enemy against that character. If the nominated character is slain by a vehicle from this formation, that model regains a hull point lost earlier in the battle.
Prized Possessions: At the start of each shooting and assault phase, you can nominate a Forgefiend or Maulerfiend from this formation that is within 12" of the Warpsmith. That model uses the Warpsmith's Weapon Skill or Ballistic Skill for that Phase.
Review
This one for me gives me mixed opinions, mainly because I see no benefit to taking Maulerfiends. My reason for this, is that if you have chosen one character which is often going to be in a unit. Therefore surely a lot of fire power from two forgefiends with Hades Autocannons would be better, especially if you have to be within 12" of the Warpsmith to get the bonus!
Judgement: Glancing Hit!
Cyclopia Cabal
Units
3-5 Sorcerers
Rules
Shroud of Deceit: Select one model from this formation, this model can attempt to to cast Shroud of Deceit. For each sorcerer within 12" of the model, add one dice to the Psychic Test - These dice do not cost any warp charge points.
Warp Charge 3
Target a single - non vehicle enemy unit - within 30". The target unit cannot be locked in combat. You can immediately make a shooting attack with that unit as though it were part of your army.
Review
I am not sold on this one yet. I think Warp Charge 3 is very hard to achieve, especially without the risk of perils. Plus I think it might be hard to find space for 3 sorcerers in any army. On the plus side though, it would be funny to take a storm surge and use it against them!
Judgement: Glancing Hit!
The Tormented
Units
1 Daemon Prince
2-5 units of Possessed
Rules
Advanced Possession
Units of Possessed in this formations have Initiative and Weapon Skill 5, and Rending Special Rule. However if a unit of possessed are not locked in combat at the end of the turn, not within 18" of the Daemon Prince they must take a leadership check. If they fail the leadership check they must move D6 the following turn rather than their standard move.
Review
All kinds of yes! Weapon Skill 5 and Rending on Possessed is such a strong change for them. That is ignoring the standard roll that you also get because of Vessels of Chaos.
In addition to the upsides, the downside to this formation is not really much of a problem considering they are Leadership 9 as standard!
If you want anything good in combat, why wouldn't these be in your army!
Judgement: Penetrating Hit!
Black Legion Warband
Units
1 Chaos Lord
0-1 Sorcerer
2-6 units of Chaos Space Marines or Chosen (in any combination)
1-3 units of Chaos Terminators or Possessed
1-3 units of Raptors, Warp Talons or Bikers
1-3 units of Havocs or Hellbrutes
Rules
Favoured of the Warmaster
When a model in the Formations gets to roll on the Chaos Boon table, you roll twice and you get to choose which one you want or both.
Thirst for Glory
If a unit from the Formation destroys an enemy unit, all other units in the formation re-roll all 1's on rolls to hit and to wound.
Review
This is a debatable one. In large games, you would have to take it, but in smaller games it could be difficult to get enough to fill the formation.
On the other side, as a stand alone formation, this is a great formation. For example if you can quickly kill a rhino/transport with the Havoc or Hellbrutes you are getting to re-roll all 1's from that point on!
I think if your game is big enough you have to take this formation!
Judgement: Penetrating Hit!
Overall
I would have to say this supplement is well overdue. Some of these formations together in an army could make Chaos relatively competitive. I am looking forward to the whole chaos codex when it is redone!
Judgement: Penetrating Hit!
Remember peeps, this is my opinion and you do not need to take it as gospel, but that's up to you!
Subscribe To

 Posts
All Comments
Posts
All Comments
Saturday, 23 April 2016

Thursday, 21 April 2016
700 Points Game of Hobbit SBG - Hold Ground!
Gandalf weary from his ride, but determined none the less burst through the door of Gimlis holdfast stirring Gimli, Captain Gloin and few other dwarves from their slumber. ''The Golden King marches for Darrowdel!'' and with that Gimli was straight to his feet, Captain Gloin was issuing orders and a runner had been sent for Floi Stonehand. The dwarves would march to battle once more!
Tonight we played a 700 point game of Hobbit SBG and the mission was Hold Ground, this would be mine and Matty's first game since 'I am Alpharius', with which a overview post will be soon to follow! Matty brought his dwarves with an allied Gandalf along and I would use my Fallen Realms mix of evil men with lists soon to follow! We rolled for mission and got Hold Ground! we set up terrain; a ruined town and decided to use a statue as the objective.
Now no game is complete without a narrative so we decided that the town would be the ruined town of Darrowdel and that it was rumoured that a lost stash of magical elvish blades had been hidden under the statue of a long lost king. Now such a great prize couldn't be ignored by either force, so the race was on!
The objective of Hold Ground! is for each force to end the game with more models within 6 inches of the objective, points are also awarded for breaking your opponents force and killing its leader. Now on to the participating forces:

Gandalf the Grey
Gimli
9 Khazard Guard
1 Dwarf Warrior with banner
Captain Gloin (Dwarf Captain with shield)
6 Dwarf Warriors with shields
2 Dwarf Warriors with two handed weapons
1 Dwarf Warrior with banner
Floi Stonehand
5 Dwarf Warriors with bows
1 Dwarf Hornblower
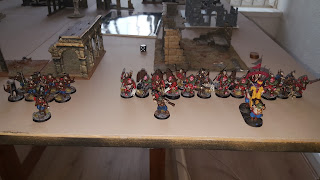

Gandalf and the Golden King had split up their forces in order to cover more ground and to find the fabled statue, resulting in several minor skirmishes and warbands loosing each other within the ruins of Darrowdel. Regardless of the maelstrom of battle several warbands had the prize within their sights...a bloody fight was soon to ensure.


Manse had received bungled orders arriving isolated and to the south, Gimli had spied them long off and had his warband set an ambush for them.
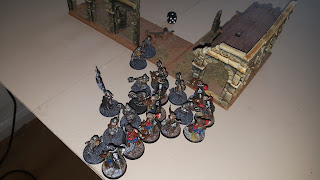
Caught completely unaware and unprepared Manse and his men were rushed by the dwarves and in the ensuring fight one corsair was dragged low, fortunately their years of plying their trade as mercenaries has made them merciless fighters able to hold their ground against the noble dwarven fighters. Elsewhere everyone was rushing desperately to get their hands on the statue, the dwarves even loosed a few arrows but were to hasty for any to make their marks.

Sensing that this fight wasn't going to go his way manse calls a heroic move and flees calling with me, bringing his warriors with him. One of which was too slow, even the short legged dwarves were able catch him and slay him. Gimli ordered half his warband to go for the statue, sensing that the corsairs would put up little resistance and that the prize was of greater concern.

Still both the forces of good and evil made with great haste for their much sought after prize, the dwarves were still taking pot shots at the mahud, however this time they found their marking placing an arrow through the neck and eye of a half troll, with a gurgling moan the half dropped to the ground all life gone from it. The beasts fellows advanced on determined to avenge their fallen comrade.

Baying for revenge several Mahud split off from the main body with a burning desire to tear apart the dwarven archers who had slain yet another of their number.

Both sides had their weapons drawn and were advancing ready for a fight. Gandalf expends some of his will power in order to conjure up a sorcerous blast, which proceeds to knock several evil warriors to their feet only for them to get back up.

The dwarves form a shield wall in expectation for the half troll charge, goaded on by their fellow mahud, the half trolls rush headlong at the dwarves preparing to put their full weight in to crushing body slams and charges.

The corsairs continue to fight a desperate retreat, they're outclassed by the heavily armoured dwarven opponents and another of their number is brought low.

The half trolls crash head long into the dwarven line, but they hold firm remembering the years of training. The dwarves are inspired further by the inspiring presence of Ganadalf's counter attack, which he commenced with another a much more effective sorcerous blast which slayed 2 mahud warriors.
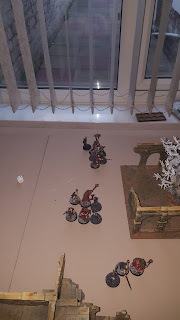
The mahud catch up the dwarven archers, keen for revenge! The dwarves are going to have a desperate fight on their hands!

Gandalf calls a heroic combat alongside 3 dwarven warriors, they intend to trap the half troll and slay it between them before joining the fray elsewhere. However the half troll proves to be a fearsome opponent fending them off but suffers a wound despite its effort.
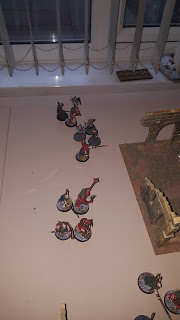

The battle was now in full flow with two clearly opposing shield walls, the mahud appeared to be in control of the prize with the dwarves fighting valiantly to take it from them. Gandalf continued to make himself feared and rightfully so as he killed an additional two mahud with a third sorcerous blast.

Both sides had taken heavy casualties and were drawing closer and closer to being broken. In a stroke of genius and bravery on his part Captain Gloin called a heroic move and grabbed the prize from evil control. Gandalf continues his rampage kill a fifth mahud with his magic.

The mahud that had split off earlier arrive to help claim the prize, the task master calls a heroic move in order to try consolidate the evil forces position and to keep a hold on the objective. Gandalf keeping up magical prowess kills a half troll this time with his sorcerous blast.

The Golden King shouted desperately for his warriors to attend him but found himself cut off from the bulk of his followers. Gimli and Gandalf see this and instantly take advantage of it calling heroic combats, they each slew a half troll before charging the Golden King dragging him down in to the dirt making short work of him and his attendants.

Radyr seizes command seeing his opportunity for glory and pushes the mahud onwards with his whip, the halfs trolls depraved and loyal to their dead master double their efforts anguish and rampage amongst the dwarves splitting skills and crunching bones underfoot. Witnessing the devastation being wrought by the mahud and realising that too many of his comrades had fallen Gandalf sounds the retreat knowing it would be futile and a waste of good warriors to continue the fight.
With that both forces were broken we rolled for the game to end and it did at the first opportunity. The forces of evil had emerged victorious with 10 models by the objective and an additional point for breaking the forces of good. The forces of good had just 2 models left alive by the objective, they scored a third point for breaking the forces of evil and another 3 points for slaying the Golden King, the evil forces leader.
Tonight we played a 700 point game of Hobbit SBG and the mission was Hold Ground, this would be mine and Matty's first game since 'I am Alpharius', with which a overview post will be soon to follow! Matty brought his dwarves with an allied Gandalf along and I would use my Fallen Realms mix of evil men with lists soon to follow! We rolled for mission and got Hold Ground! we set up terrain; a ruined town and decided to use a statue as the objective.
Now no game is complete without a narrative so we decided that the town would be the ruined town of Darrowdel and that it was rumoured that a lost stash of magical elvish blades had been hidden under the statue of a long lost king. Now such a great prize couldn't be ignored by either force, so the race was on!
The objective of Hold Ground! is for each force to end the game with more models within 6 inches of the objective, points are also awarded for breaking your opponents force and killing its leader. Now on to the participating forces:
The forces of Good

Gandalf the Grey
Gimli
9 Khazard Guard
1 Dwarf Warrior with banner
Captain Gloin (Dwarf Captain with shield)
6 Dwarf Warriors with shields
2 Dwarf Warriors with two handed weapons
1 Dwarf Warrior with banner
Floi Stonehand
5 Dwarf Warriors with bows
1 Dwarf Hornblower
The Forces of Evil

The Golden King
6 Half Trolls
6 Mahud with spear and shield
Rhadyr (Taskmaster)
6 Half trolls
6 Mahud with spear and shield
Manse (Corsair Captain with crossbow)
8 Corsair Arbelestors
The Game!

Gandalf and the Golden King had split up their forces in order to cover more ground and to find the fabled statue, resulting in several minor skirmishes and warbands loosing each other within the ruins of Darrowdel. Regardless of the maelstrom of battle several warbands had the prize within their sights...a bloody fight was soon to ensure.

The Golden King's and Radyr's warbands arrived from the north west, quickly reorganising themselves for their advance on the hidden stash. Floi's warband and Gandalf arrived from the north spying the Mahud to their right and advanced with caution. Captain Gloin marched his warband in from the east with a clear run at the prize ahead of them.
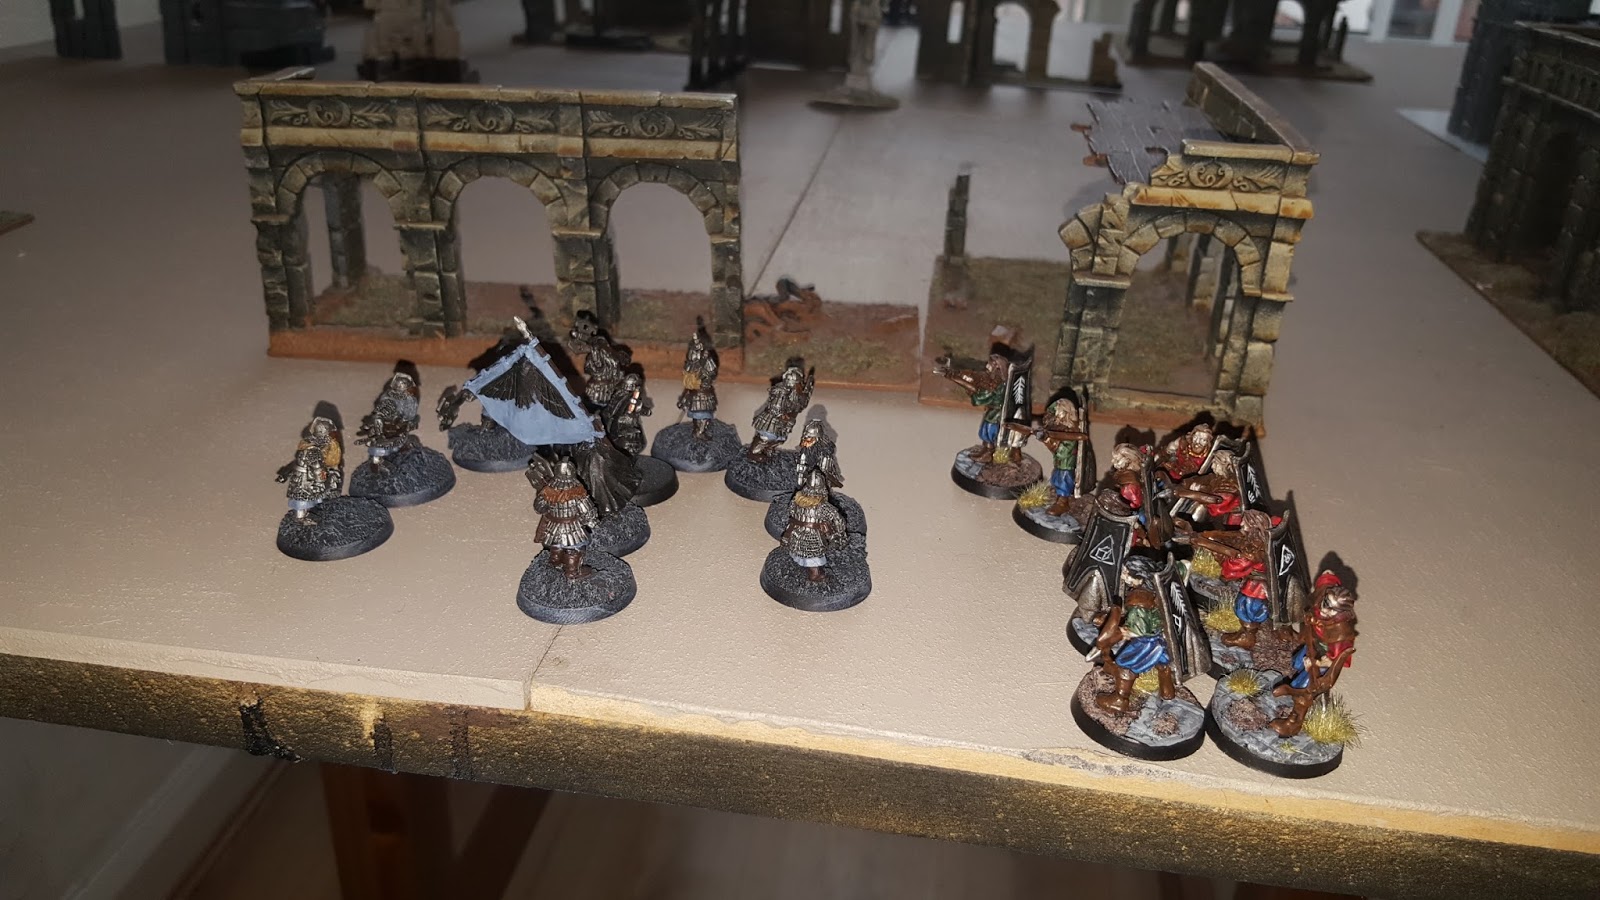
Manse had received bungled orders arriving isolated and to the south, Gimli had spied them long off and had his warband set an ambush for them.

Caught completely unaware and unprepared Manse and his men were rushed by the dwarves and in the ensuring fight one corsair was dragged low, fortunately their years of plying their trade as mercenaries has made them merciless fighters able to hold their ground against the noble dwarven fighters. Elsewhere everyone was rushing desperately to get their hands on the statue, the dwarves even loosed a few arrows but were to hasty for any to make their marks.

Sensing that this fight wasn't going to go his way manse calls a heroic move and flees calling with me, bringing his warriors with him. One of which was too slow, even the short legged dwarves were able catch him and slay him. Gimli ordered half his warband to go for the statue, sensing that the corsairs would put up little resistance and that the prize was of greater concern.

Still both the forces of good and evil made with great haste for their much sought after prize, the dwarves were still taking pot shots at the mahud, however this time they found their marking placing an arrow through the neck and eye of a half troll, with a gurgling moan the half dropped to the ground all life gone from it. The beasts fellows advanced on determined to avenge their fallen comrade.

Baying for revenge several Mahud split off from the main body with a burning desire to tear apart the dwarven archers who had slain yet another of their number.

Both sides had their weapons drawn and were advancing ready for a fight. Gandalf expends some of his will power in order to conjure up a sorcerous blast, which proceeds to knock several evil warriors to their feet only for them to get back up.

The dwarves form a shield wall in expectation for the half troll charge, goaded on by their fellow mahud, the half trolls rush headlong at the dwarves preparing to put their full weight in to crushing body slams and charges.

The corsairs continue to fight a desperate retreat, they're outclassed by the heavily armoured dwarven opponents and another of their number is brought low.

The half trolls crash head long into the dwarven line, but they hold firm remembering the years of training. The dwarves are inspired further by the inspiring presence of Ganadalf's counter attack, which he commenced with another a much more effective sorcerous blast which slayed 2 mahud warriors.
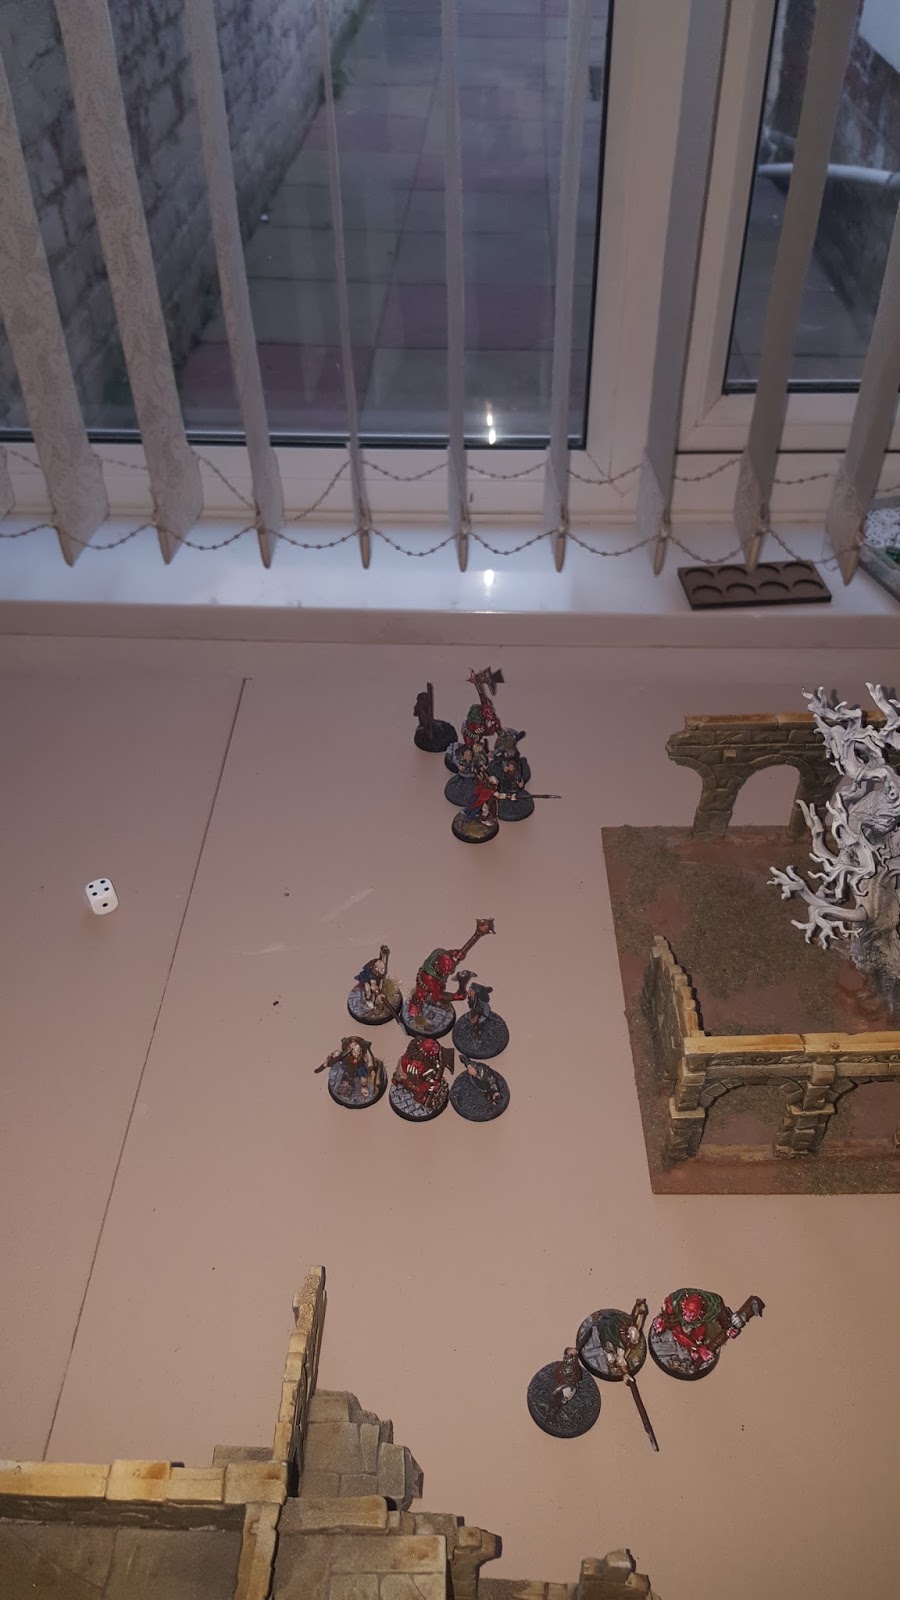
The mahud catch up the dwarven archers, keen for revenge! The dwarves are going to have a desperate fight on their hands!

Gandalf calls a heroic combat alongside 3 dwarven warriors, they intend to trap the half troll and slay it between them before joining the fray elsewhere. However the half troll proves to be a fearsome opponent fending them off but suffers a wound despite its effort.

Two of the archers were torn apart mercilessly by the mahud, the half trolls had tasted blood and were keen to taste further dwarf flesh.

The battle was now in full flow with two clearly opposing shield walls, the mahud appeared to be in control of the prize with the dwarves fighting valiantly to take it from them. Gandalf continued to make himself feared and rightfully so as he killed an additional two mahud with a third sorcerous blast.
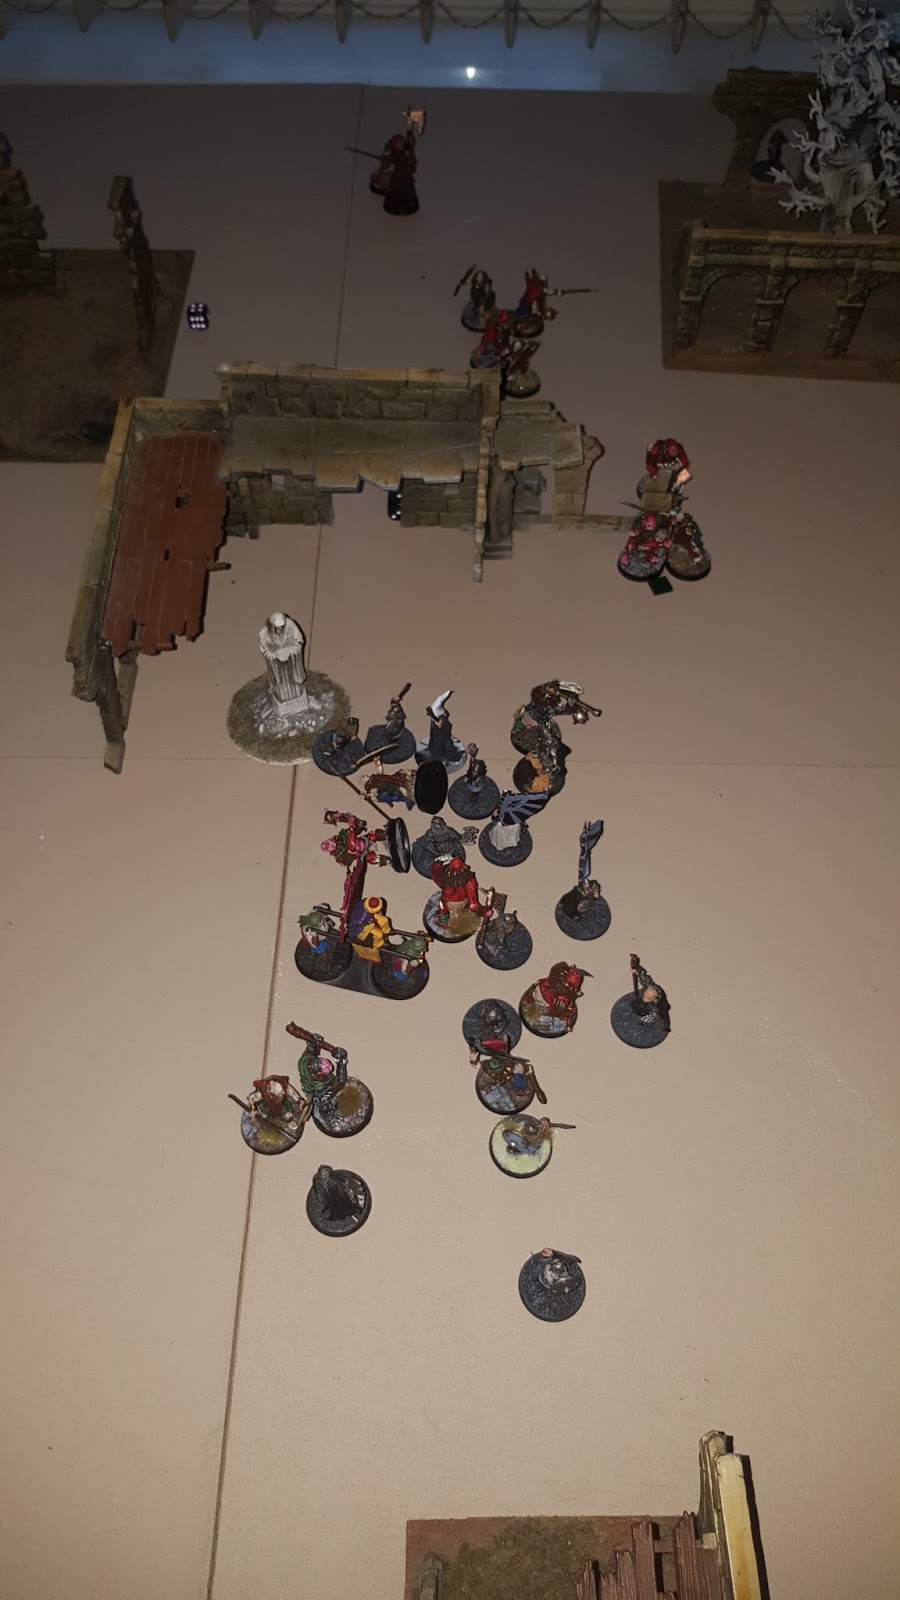
Both sides had taken heavy casualties and were drawing closer and closer to being broken. In a stroke of genius and bravery on his part Captain Gloin called a heroic move and grabbed the prize from evil control. Gandalf continues his rampage kill a fifth mahud with his magic.

The mahud that had split off earlier arrive to help claim the prize, the task master calls a heroic move in order to try consolidate the evil forces position and to keep a hold on the objective. Gandalf keeping up magical prowess kills a half troll this time with his sorcerous blast.

The Golden King shouted desperately for his warriors to attend him but found himself cut off from the bulk of his followers. Gimli and Gandalf see this and instantly take advantage of it calling heroic combats, they each slew a half troll before charging the Golden King dragging him down in to the dirt making short work of him and his attendants.

Radyr seizes command seeing his opportunity for glory and pushes the mahud onwards with his whip, the halfs trolls depraved and loyal to their dead master double their efforts anguish and rampage amongst the dwarves splitting skills and crunching bones underfoot. Witnessing the devastation being wrought by the mahud and realising that too many of his comrades had fallen Gandalf sounds the retreat knowing it would be futile and a waste of good warriors to continue the fight.
With that both forces were broken we rolled for the game to end and it did at the first opportunity. The forces of evil had emerged victorious with 10 models by the objective and an additional point for breaking the forces of good. The forces of good had just 2 models left alive by the objective, they scored a third point for breaking the forces of evil and another 3 points for slaying the Golden King, the evil forces leader.
End Result
Forces of Evil - Forces of Good
11 - 6
Luke's Thoughts
That was an awesome game with plenty of bloody fights! Matty really got the drop on me at the start and i thought the corsairs were done for, I can't believe 4 of them survived in the end. The half trolls really showed their worth this game pummelling the dwarven line and by succeeding in securing the statue for me. It was a great move on Matty's part jumping the golden king and killing him outright. Overall i really enjoyed the game and look forward to the next battle,
Matty's Thoughts
Oh man I thought I had that one, Luke's half trolls literally clawed it back for him! They're really tough critters and my dwarves just couldn't kill enough of them. I was really impressed with Gandalf , his spells were essential to reducing the evil forces in number and for disrupting their lines. Luke's victory will be short lived for my name is Matthew Decimus Wilson, commander of the dwarven holds, general of Durins folk, loyal servant to the free peoples. Father to murdered son, husband to a murdered wife and I will have my vengeance in this life or the next!!....Alright I don't have a wife or a son, but you killed my favourite Khazard guard so ill get you next time!
Wednesday, 20 April 2016
I am Alpharous! The Aftermath
Last weekend we took part in the I am Alpharius event at Warhammer World, and a good time was had by many.
Me and Ash did not have a massive success, winning only one game and being tabled twice, but Luke and Matty had a good run, ending up with the prize for having the most points after everyones victory points had been multiplied by their favourite games votes. Congratulations to them, I'll let them write about makes them both effective and likable later.
Me and Ash went up against Ravenwing / Skittari and learnt how harsh Tesla weapons can be, although my berzerker champion made it across the board and slaughtered a Skittari squad. Ash's deamon prince wiped out a unit of Ravenwing bikers and was squaring up to Sammeal when he was gunned down. Sammy had vent on the cultists champion, which led to him running down the other 14 cultists.
Our second game was against an implausible alliance of Blood Angels and Dark Eldar. This was the deamon's best game, romping up one flank before turning around to help with a massive unit of Death Company. My Possessed had a brief moment of glory charging a unit arriving by drop pod, but this pulled them into a bad position for a charge from the death company. My Berzerkers charged in and obligingly took a few turns to die to allow us to handle the rest of the army. I summoned a deamon prince of my own with blood tithe points. Once all the Berzerkers were dead our Shooting could handle the remaining death company before Free Prince and a Helbrute charged in to finish off the Chaplain. Ash voted this his favourite game.
We faced Luke and Matty for our 3rd game, and were promptly obliterated by bolter fire. The deamon prince did not do well, the Berzerkers were shot up, the Possessed were killed by a Death Company (again) and my chaos marine champion fought 4 combat squads of Tactical Marines in the centre of the board, as the only remaining model on our side, for at least 4 rounds of combat, killing a couple of sergeants and chasing off a couple of squads. This dragged the game out until turn 7 letting them grab many objectiveswith the rest of the army, no doubt helping them with the prize at the end. Not deliberate Tyrants tactics, although I did give them my favourite game vote.
After this we headed back to the city centre by tram, and returned by tram the next day. The trams are great and could be my new favourite form of transport, even if the driver wouldn't give us tramming speed when we asked, nor divert all power to the tram reactors.
Game 4 was our second tabling, as we went up against 5 riptide battle suits. This was the obligatory poor game, with only the one Helbrute making it across the board and not kill a riptide in combat. The deamon prince was killed in turn 2 without getting a charge, the Possessed were poorly deployed (my fault) but are gunned down without achieving anything and even the defiler blazed away pointlessly. The opponents argued amongst themselves over who got to finish us of, my ally went to the bar and the opponent apologised for their force. If you have to apologise for something like that, don't do it.
Game 5 put us against deathwing and mantis legion with a forgeworld knight. We had some unlucky rolls in this game, failing 3 out of 4 charges onto the knight when we could have ripped it to shreds been 2 Helbrutes, the defiler and Obliterators. As it was we got it down to 2 hull points slowly. This was the only game the deamon prince lived to the end of, after Ash made the sensible decision not to use the black mace anymore and just resort to his ccw. This was one of a few games this event which took a lot longer than I am used to, ending on about turn 4 after the full 2 hours 30 minutes. Maybe I'm just a hasty player.
Still to come: the event as a whole and the exhibition centre.
I'm sure others will have their own thoughts to post.
Me and Ash did not have a massive success, winning only one game and being tabled twice, but Luke and Matty had a good run, ending up with the prize for having the most points after everyones victory points had been multiplied by their favourite games votes. Congratulations to them, I'll let them write about makes them both effective and likable later.
Me and Ash went up against Ravenwing / Skittari and learnt how harsh Tesla weapons can be, although my berzerker champion made it across the board and slaughtered a Skittari squad. Ash's deamon prince wiped out a unit of Ravenwing bikers and was squaring up to Sammeal when he was gunned down. Sammy had vent on the cultists champion, which led to him running down the other 14 cultists.
Our second game was against an implausible alliance of Blood Angels and Dark Eldar. This was the deamon's best game, romping up one flank before turning around to help with a massive unit of Death Company. My Possessed had a brief moment of glory charging a unit arriving by drop pod, but this pulled them into a bad position for a charge from the death company. My Berzerkers charged in and obligingly took a few turns to die to allow us to handle the rest of the army. I summoned a deamon prince of my own with blood tithe points. Once all the Berzerkers were dead our Shooting could handle the remaining death company before Free Prince and a Helbrute charged in to finish off the Chaplain. Ash voted this his favourite game.
We faced Luke and Matty for our 3rd game, and were promptly obliterated by bolter fire. The deamon prince did not do well, the Berzerkers were shot up, the Possessed were killed by a Death Company (again) and my chaos marine champion fought 4 combat squads of Tactical Marines in the centre of the board, as the only remaining model on our side, for at least 4 rounds of combat, killing a couple of sergeants and chasing off a couple of squads. This dragged the game out until turn 7 letting them grab many objectiveswith the rest of the army, no doubt helping them with the prize at the end. Not deliberate Tyrants tactics, although I did give them my favourite game vote.
After this we headed back to the city centre by tram, and returned by tram the next day. The trams are great and could be my new favourite form of transport, even if the driver wouldn't give us tramming speed when we asked, nor divert all power to the tram reactors.
Game 4 was our second tabling, as we went up against 5 riptide battle suits. This was the obligatory poor game, with only the one Helbrute making it across the board and not kill a riptide in combat. The deamon prince was killed in turn 2 without getting a charge, the Possessed were poorly deployed (my fault) but are gunned down without achieving anything and even the defiler blazed away pointlessly. The opponents argued amongst themselves over who got to finish us of, my ally went to the bar and the opponent apologised for their force. If you have to apologise for something like that, don't do it.
Game 5 put us against deathwing and mantis legion with a forgeworld knight. We had some unlucky rolls in this game, failing 3 out of 4 charges onto the knight when we could have ripped it to shreds been 2 Helbrutes, the defiler and Obliterators. As it was we got it down to 2 hull points slowly. This was the only game the deamon prince lived to the end of, after Ash made the sensible decision not to use the black mace anymore and just resort to his ccw. This was one of a few games this event which took a lot longer than I am used to, ending on about turn 4 after the full 2 hours 30 minutes. Maybe I'm just a hasty player.
Still to come: the event as a whole and the exhibition centre.
I'm sure others will have their own thoughts to post.
Tuesday, 16 February 2016
Teesside Tyrants: Shirts
As part of our upcoming trip to 'I am Alpharius' in April I'm working on Polo Shirts with a badge, to mark us out as the kings of kool.
Here's what I've got so far.

This logo fulfils Pad's desire to have a skull, but without the serious and hard to find in lineart crown, instead having a sombero like we had ourselves at the Council of War in September, which makes the whole thing about as jolly as a skull can be.
I'm aiming for a purple / burgundy shirt with the logo and text in orange or gold.
I also asked for some quotes from different companies. The table below assumes 12 shirts all being the same price and splits the cost of the embroidery set up and delivery where appropriate. All numbers in Pounds.
Seller
|
Price per shirt
|
One off costs
|
Extra for names
|
Total
|
Each
|
Dimensions
|
12
|
24
|
2
|
192
|
16
|
T Shirt Kings
|
7.8
|
26.4
|
1.5
|
138
|
11.5
|
Krowmark
|
9.66
|
22.74
|
1.5
|
156.66
|
13.055
|
TagTeamWear
|
10.8
|
129.6
|
10.8
|
Dimensions is the most expensive despite being in Middlesbrough, although this has the advantage I'll be able to go in and see them. T-Shirt Kings had a vague quote so I've made some assumptions and asked for clarifications, although their website claimed to have a Middlesbrough branch the reple email came from Middlesex which is slightly different.
Krowmark look the most professional, mainly branded company clothing from what I can tell. They also offered to put the name on the opposite side to the logo for an extra £1.
I've emailed TagTeamWear for more info as they did not specify and 1 off costs or delivery. I emailed a local company but they referred me to TagTeamWear so I don't actually know if they are local.
Anyway, pending a response from the companies I've asked for info from, what do people think? Anyone who wants a shirt post in the comments with your size. The price per person will go down a the fixed cost is split between more people.
Friday, 5 February 2016
I am Alpharius! Prologue
One of the highlights of our gaming calendar is our occasional trips to Warhammer World in Nottingham to enter the events they have there. Most recently we went to a Council of War 4-person team event last September, but in the past we've been to Doubles and a Campaign Weekend.
Our next event is to be the Doubles event 'I am Alpharius!' in April, and this looks to be the best attendance record yet for our little group, with either 8 or 10 players travelling down. Most of us will be taking armies we already have, with a few extra units added maybe, but Pad and Steve are taking it seriously by both starting a new Tau army with no time to spare! ( I do hope Pad can spare some time though, to write some blog articles about it)
Currently our contribution looks like this, subject to change:
Tau & Tau (Paddy and Steve)
Space Wolves & Space Wolves (Graham and Dan)
Iron Warriors and Space Sharks (Luke and Matty)
Deamonkin and Chaos Space Marines (Martin and Ash)
Space Marines and TBA (Carl and Lottie)
My Chaos has Alpha Legion Shoulder pads, which sort of makes them appropriate.
Is anyone else planning on going to this event? Is anyone else reading this blog? Let us know below!
Wednesday, 25 November 2015
Battle Report: Dark Angels v. Orks
Hi, and welcome to our first battle report. This is very much a test of the process, and features Paddy with his Dark Angels taking on Graham with his Orks. I will be writing it as they play.
 Warlord traits:
Graham (Ork Warboss) Divide to Conquer and Strategic Genius
Paddy (Sammeal) Rapid Manouver
The mission is Cloak and Shadows, worth a pitched battle deployment.
Paddy chose table edge, Graham won the roll off for deployment and choose to deploy second.
Deployment
Dark Angels, from left to right
Tactical squad & Librarian ( Aversion,mind worm, Trephination)
Deathwing knights & Chaplain
Combat squad
Combat squad
Devestators
Reserves
Ravenwing command squad & command squad
Ravenwing bike squad
Dark Talon

Orks, left to right
Slugga Boyz
Slugga Boyz
Ard Boyz, Warboss, trukk
Ard Boyz, Warboss, trukk
Sligga boyz, truck
Tankbustas
Shoota Boyz & Warboss & Painboy
Deffkoptas (3 separate units)
Paddy goes first.
Movement phase
Slight shuffle along right phase.
Psychic phase
Cast aversion on Tankbustas.
Shooting phas
Tactical squad runs into ruins
Knights run through combat squads
Devastators shoot Ard Boyz trukk,wrecked. (First Blood)
No combat
No victory points (1-0)

Ork turn 1
Deffkoptas fly towards tower.
Slugga Boyz move fowards, suspiciously in a neat formation.
remaining trukks and Ard Boyz move forwards
Slugga Boyz move forwards, some confusion over who belongs to which mob. (Which Nob is da best?)
Tankbustas move to upper stories of ruins.
Shooting phase
Deffkoptas fail to wound Librarian.
Tankbustas kill 1 marine from 1st combat squad.
Trukks go flat out fowards
Other mobs run
No combat
Score 1vp for 'more speed, go fasta' (1-1)

Dark Angel turn 2
Movement phase
Ravenwing reserves arrive automatically on the left flank.
Knights surround the trukk.
Psychic phase
Aversion cast on Tankbustas.
Shooting phase
Combat squad 2 shoots at trukk, 2 hull points lost.
Combat squad 1 shoots at trukk, plasma cannon overheats and dies!
Tactical squad kills 4 Shoota Boyz.
Devestators all miss the Ard Boyz.
Dark Talon falls to wound a Deffkopta.
Ravenwing Command kill a Deffkopta.
Ravenwing bikers wound the Deffkopta behind the lines.
Combat phase
Knights charge trukk and wreck it. Slugga Boyz disembark into convenient ruin.
No victory points this turn. (1-1)

Ork turn 2
Movement Phase
1 Deffkopta moves behind Dark Talon.
Disembarked Slugga Boyz move towards combat squad 2.
infantry wave continues fowards.
Second unit of Ard boys move behind Devestators and disembark.
Backline Warboss joins Tankbustas

Shooting phase
Deffkopta fails to kill any Tactical Marines
Slugga Boyz fail to wound Sammy.
Tankbustas fail to kill any Tactical marines (Aversion helps a lot)
1 marine in combat squad 2 dies to Slugga fire.
Big slugga mobs run (slowly)
Combat phase
Small Slugga mob charges combat squad 2, 1 killed by overwatch.
1 Ork killed in combat,
35 attacks from the orks (!) kills the 4 remaining marines.
Mounted Ard Boyz unit charges Devestators, 1 killed by overwatch.
1 Ork killed in combat
Devestators wiped out.

1 victory point for objective 3 and 1 for Stomp 'em Boyz. (1-3)
Dark Angel turn 3
Movement phase
Knights move to take on Slugga Boyz with Warboss.
Dark Talon drops the stasis bomb on the shoota boyz.
Ravenwing bikes and command squad zip towards Shoota Boyz.
Tactical squad leaves ruin and Librarian leaves the squad.
Psychic phase
Librarian activates force weapon.
Shooting phase
Librarian finishes off the wounded Deffkopta.
Tactical squad kills 1 Ard boy from the trukk unit.
Dark Talon kills 3 Ard boys and a Warboss in the foot unit. (It's OK boss, don't look out.)
Ravenwing Command kills 5 Shoota Boyz, banner bearer dies from overheating.
Combat phase
Deathwing knights charge Slugga Boyz, overwatch kills none.
29 Ork attacks first as the knights charged through cover, no wounds.
Knights kill 9 orks
Challenge!
Chaplain batters Nob into ground.
Orks flee 7" as Knights consolidate.
Ravenwing Command charges shoota boyz, overwatch kills none, Ravenwing bikers fail to join them.
1 dead from hammer of wrath
Sammy kills 1 Ork.
Squad kills 5.
none left within 3". Combat ends.
No victory points this turn (1-3)
Ork turn 3
Movement phase
fleeing Slugga Boyz rally
trukk Ard Boyz and trukk Slugga Boyz advance out of ruins.
Shoota Boyz move towards Ravenwing command squad.
Shooting phase
shoota boyz fail to dent Ravenwing command.
Big slugga unit shoots at knights, 21 shots achieves nothing.
Last Deffkopta singles out solo Librarian and wounds, armour save lands a 1 but bounces onto a 2!
Tankbustas kill a Ravenwing biker. Bikers choose to jink.
Combat phase
Shoota Boyz charge Ravenwing command overwatch, kills none.
Squad kills 3 orks,
orks kill no bikers.
Challenge!
Sammy caused 2 wounds on painboy, saved on feel no pain.
Painboy causes 1 wound, saved on armour.
Orks stay in combat thanks to bosspole.
command squad uses hit and run.
Trukk Slugga Boyz charge remaining combat squad and are joined by trukk Ard Boyz.
Marines cause no wounds.
Orks politely stand aside and allow the nobs to kill the marines to save time.
Orks consolidate into the ruin with the Tactical squad.
Orks receive 1 victory point for objective 4, 1 for Hungry for Glory, and 1 for No Prisoners. (1-6)
Dark Angel turn 4
Movement Phase
Deathwing knights move closer to Ork horde
Ravenwing bikers move to engage last Deffkopta.
Ravenwing Command moves back to threaten the much reduced shoota boyz.
Librarian sidesteps outflanking trukk mobs.
Dark Talon enters hover mode.
Psychic phase
Trephination cast on Ard Boyz, no effect.
Shooting phase
Tactical squad pours fire into Ard Boyz, kills all except Nob and Warboss but does 1 wound on each of them.
Ravenwing bikers fire lots of shots but fail to bring down the last Deffkopta.
Ravenwing Command is ineffective against the shoota boyz.
the dark Talon raked the infantry Ard Boyz for 3 kills.
Ard Boyz & Warboss fail panic test but are saved by a bosspole.
Combat phase
Ravenwing bikes try to charge Deffkopta but one dies to overwatch and the others fail to reach the enemy.
hammer of wrath kill 2 orks
Ravenwing kill 4 remaining orks,
Ork Nob kills 2 Ravenwing
Challenge!
Sammy causes 2 wounds on painboy , 1 saved by feel no pain
Painboy finishes off Sammy. (Slay the Warlord)
Despite this, the Nob kills the painboy to prevent himself running away.
Ravenwing Command charges shoota boyz, Sammy wounded by overwatch.
Knights charge weakened Slugga Boyz mob.
Hammer of wrath kills 1.
Chaplain misses the foe!
Knights pound 10 orks, finishing the unit off and letting the Chaplain of the hook
3 victory points for the dark Angels from 'Not One Step Backwards' (4-7)
Ork turn 4
Movement Phase
Big slugga unit bears down on deathwing knights
Remnants of trukk Slugga mob pound through Ard Boyz unit towards Tactical squad.
trukk Warboss squares up to Librarian.
Solo shoota Nob wanders about confused as to why he is alive and where the Ravenwing have all gone.
Shooting phase
Almost all the remaining orks unleash a hail of vaguely accurate shooting at the Deathwing Knights for no effect, except the Tankbustas who cause 2 hull points on the dark Talon and destroy a hurricane bolter.
The last Deffkopta turbo boosts to escape the bikers.
Combat phase
Warboss charges Librarian
Librarian fails to hit.
Warboss only hits once, but snips the psyker in half with his power klaw.
Big mob of Slugga charge deathwing knights, joined by the Warboss from the Tankbustas.
Deathwing knights use smite.
3 wounds caused on Warboss, 2 saved by the beasts cybork body.
1 other Ork killed.
74 standard Ork boy attacks back manages to bring down the Chaplain.
The Warboss kills 1 knight.
Trukk Slugga boyz charge the Tactical Squad, losing 2 boyz to overwatch.
Marines cause 3 casualties.
Orks fail to kill any orks
Challenge!
sergeant kills the Nob
Ork unit passes the break test.
Orks receive 1 victory point for objective 1 and 1 for 'assassinate'. (4-9)
Dark Angel turn 5
Movement Phase
Ravenwing bikers move to avenge the Librarian.
Shooting phase
Ravenwing bikes and Dark Talon don't even wound the Warboss.
Combat phase
Tactical squad kills all except the Nob, who bravely stands his ground.
Knights v. Orks
knights kill none.
Ork Nob kills a single knight.
No objectives achieved. (4-9)
Ork turn 5
Movement Phase
Deffkopta moves and turbo boosts over to objective 4.
Warboss waddles towards Tactical squad.
Shooting phase
nah...
Combat phase
Warboss charges Tactical squad and kills 2 for no comeback. The Tactical squad is stubborn.
Knights v. Orks
knights kill 1
orks kill 1 also. Warboss gets the other 2
Orks get 1 victory point for objective 4 (4-10)
End of game!
Orks get linebreaker for (4-11)
Waaaaghhh!!!!!
despite the end score, the game was quite close up to the last couple of turns. I really struggled against the knights until i managed to get the better part of 4 squads in against them. i was also really lucky with my bosspole rolls, lol. I only had one unit run away, and that was because the nob was dead.Even then, it rallied and helped finish off the deathwing knights. I had hoped to use the deffkoptas to dash about and sieze bjectives but most of the cards i drew were of the kill this/do that type, but they still played their part, a nuisance if nothing else.Unit of the game had to be the shoota mob, with a painboy attached they weathered a lot of flak, and of course, the painboy killed the warlord,samnael. all in all a good game against a great opponnt, but victory went where it belonged, to the orks!!!!

Graham (Ork Warboss) Divide to Conquer and Strategic Genius
Paddy (Sammeal) Rapid Manouver
The mission is Cloak and Shadows, worth a pitched battle deployment.
Paddy chose table edge, Graham won the roll off for deployment and choose to deploy second.
Deployment
Dark Angels, from left to right
Tactical squad & Librarian ( Aversion,mind worm, Trephination)
Deathwing knights & Chaplain
Combat squad
Combat squad
Devestators
Reserves
Ravenwing command squad & command squad
Ravenwing bike squad
Dark Talon

Orks, left to right
Slugga Boyz
Slugga Boyz
Ard Boyz, Warboss, trukk
Ard Boyz, Warboss, trukk
Sligga boyz, truck
Tankbustas
Shoota Boyz & Warboss & Painboy
Deffkoptas (3 separate units)
Paddy goes first.
Movement phase
Slight shuffle along right phase.
Psychic phase
Cast aversion on Tankbustas.
Shooting phas
Tactical squad runs into ruins
Knights run through combat squads
Devastators shoot Ard Boyz trukk,wrecked. (First Blood)
No combat
No victory points (1-0)

Ork turn 1
Deffkoptas fly towards tower.
Slugga Boyz move fowards, suspiciously in a neat formation.
remaining trukks and Ard Boyz move forwards
Slugga Boyz move forwards, some confusion over who belongs to which mob. (Which Nob is da best?)
Tankbustas move to upper stories of ruins.
Shooting phase
Deffkoptas fail to wound Librarian.
Tankbustas kill 1 marine from 1st combat squad.
Trukks go flat out fowards
Other mobs run
No combat
Score 1vp for 'more speed, go fasta' (1-1)

Dark Angel turn 2
Movement phase
Ravenwing reserves arrive automatically on the left flank.
Knights surround the trukk.
Psychic phase
Aversion cast on Tankbustas.
Shooting phase
Combat squad 2 shoots at trukk, 2 hull points lost.
Combat squad 1 shoots at trukk, plasma cannon overheats and dies!
Tactical squad kills 4 Shoota Boyz.
Devestators all miss the Ard Boyz.
Dark Talon falls to wound a Deffkopta.
Ravenwing Command kill a Deffkopta.
Ravenwing bikers wound the Deffkopta behind the lines.
Combat phase
Knights charge trukk and wreck it. Slugga Boyz disembark into convenient ruin.
No victory points this turn. (1-1)

Ork turn 2
Movement Phase
1 Deffkopta moves behind Dark Talon.
Disembarked Slugga Boyz move towards combat squad 2.
infantry wave continues fowards.
Second unit of Ard boys move behind Devestators and disembark.
Backline Warboss joins Tankbustas

Shooting phase
Deffkopta fails to kill any Tactical Marines
Slugga Boyz fail to wound Sammy.
Tankbustas fail to kill any Tactical marines (Aversion helps a lot)
1 marine in combat squad 2 dies to Slugga fire.
Big slugga mobs run (slowly)
Combat phase
Small Slugga mob charges combat squad 2, 1 killed by overwatch.
1 Ork killed in combat,
35 attacks from the orks (!) kills the 4 remaining marines.
Mounted Ard Boyz unit charges Devestators, 1 killed by overwatch.
1 Ork killed in combat
Devestators wiped out.

1 victory point for objective 3 and 1 for Stomp 'em Boyz. (1-3)
Dark Angel turn 3
Movement phase
Knights move to take on Slugga Boyz with Warboss.
Dark Talon drops the stasis bomb on the shoota boyz.
Ravenwing bikes and command squad zip towards Shoota Boyz.
Tactical squad leaves ruin and Librarian leaves the squad.
Psychic phase
Librarian activates force weapon.
Shooting phase
Librarian finishes off the wounded Deffkopta.
Tactical squad kills 1 Ard boy from the trukk unit.
Dark Talon kills 3 Ard boys and a Warboss in the foot unit. (It's OK boss, don't look out.)
Ravenwing Command kills 5 Shoota Boyz, banner bearer dies from overheating.
Combat phase
Deathwing knights charge Slugga Boyz, overwatch kills none.
29 Ork attacks first as the knights charged through cover, no wounds.
Knights kill 9 orks
Challenge!
Chaplain batters Nob into ground.
Orks flee 7" as Knights consolidate.
Ravenwing Command charges shoota boyz, overwatch kills none, Ravenwing bikers fail to join them.
1 dead from hammer of wrath
Sammy kills 1 Ork.
Squad kills 5.
none left within 3". Combat ends.
No victory points this turn (1-3)
Ork turn 3
Movement phase
fleeing Slugga Boyz rally
trukk Ard Boyz and trukk Slugga Boyz advance out of ruins.
Shoota Boyz move towards Ravenwing command squad.
Shooting phase
shoota boyz fail to dent Ravenwing command.
Big slugga unit shoots at knights, 21 shots achieves nothing.
Last Deffkopta singles out solo Librarian and wounds, armour save lands a 1 but bounces onto a 2!
Tankbustas kill a Ravenwing biker. Bikers choose to jink.
Combat phase
Shoota Boyz charge Ravenwing command overwatch, kills none.
Squad kills 3 orks,
orks kill no bikers.
Challenge!
Sammy caused 2 wounds on painboy, saved on feel no pain.
Painboy causes 1 wound, saved on armour.
Orks stay in combat thanks to bosspole.
command squad uses hit and run.
Trukk Slugga Boyz charge remaining combat squad and are joined by trukk Ard Boyz.
Marines cause no wounds.
Orks politely stand aside and allow the nobs to kill the marines to save time.
Orks consolidate into the ruin with the Tactical squad.
Orks receive 1 victory point for objective 4, 1 for Hungry for Glory, and 1 for No Prisoners. (1-6)
Dark Angel turn 4
Movement Phase
Deathwing knights move closer to Ork horde
Ravenwing bikers move to engage last Deffkopta.
Ravenwing Command moves back to threaten the much reduced shoota boyz.
Librarian sidesteps outflanking trukk mobs.
Dark Talon enters hover mode.
Psychic phase
Trephination cast on Ard Boyz, no effect.
Shooting phase
Tactical squad pours fire into Ard Boyz, kills all except Nob and Warboss but does 1 wound on each of them.
Ravenwing bikers fire lots of shots but fail to bring down the last Deffkopta.
Ravenwing Command is ineffective against the shoota boyz.
the dark Talon raked the infantry Ard Boyz for 3 kills.
Ard Boyz & Warboss fail panic test but are saved by a bosspole.
Combat phase
Ravenwing bikes try to charge Deffkopta but one dies to overwatch and the others fail to reach the enemy.
hammer of wrath kill 2 orks
Ravenwing kill 4 remaining orks,
Ork Nob kills 2 Ravenwing
Challenge!
Sammy causes 2 wounds on painboy , 1 saved by feel no pain
Painboy finishes off Sammy. (Slay the Warlord)
Despite this, the Nob kills the painboy to prevent himself running away.
Ravenwing Command charges shoota boyz, Sammy wounded by overwatch.
Knights charge weakened Slugga Boyz mob.
Hammer of wrath kills 1.
Chaplain misses the foe!
Knights pound 10 orks, finishing the unit off and letting the Chaplain of the hook
3 victory points for the dark Angels from 'Not One Step Backwards' (4-7)
Ork turn 4
Movement Phase
Big slugga unit bears down on deathwing knights
Remnants of trukk Slugga mob pound through Ard Boyz unit towards Tactical squad.
trukk Warboss squares up to Librarian.
Solo shoota Nob wanders about confused as to why he is alive and where the Ravenwing have all gone.
Shooting phase
Almost all the remaining orks unleash a hail of vaguely accurate shooting at the Deathwing Knights for no effect, except the Tankbustas who cause 2 hull points on the dark Talon and destroy a hurricane bolter.
The last Deffkopta turbo boosts to escape the bikers.
Combat phase
Warboss charges Librarian
Librarian fails to hit.
Warboss only hits once, but snips the psyker in half with his power klaw.
Big mob of Slugga charge deathwing knights, joined by the Warboss from the Tankbustas.
Deathwing knights use smite.
3 wounds caused on Warboss, 2 saved by the beasts cybork body.
1 other Ork killed.
74 standard Ork boy attacks back manages to bring down the Chaplain.
The Warboss kills 1 knight.
Trukk Slugga boyz charge the Tactical Squad, losing 2 boyz to overwatch.
Marines cause 3 casualties.
Orks fail to kill any orks
Challenge!
sergeant kills the Nob
Ork unit passes the break test.
Orks receive 1 victory point for objective 1 and 1 for 'assassinate'. (4-9)
Dark Angel turn 5
Movement Phase
Ravenwing bikers move to avenge the Librarian.
Shooting phase
Ravenwing bikes and Dark Talon don't even wound the Warboss.
Combat phase
Tactical squad kills all except the Nob, who bravely stands his ground.
Knights v. Orks
knights kill none.
Ork Nob kills a single knight.
No objectives achieved. (4-9)
Ork turn 5
Movement Phase
Deffkopta moves and turbo boosts over to objective 4.
Warboss waddles towards Tactical squad.
Shooting phase
nah...
Combat phase
Warboss charges Tactical squad and kills 2 for no comeback. The Tactical squad is stubborn.
Knights v. Orks
knights kill 1
orks kill 1 also. Warboss gets the other 2
Orks get 1 victory point for objective 4 (4-10)
End of game!
Orks get linebreaker for (4-11)
Waaaaghhh!!!!!
despite the end score, the game was quite close up to the last couple of turns. I really struggled against the knights until i managed to get the better part of 4 squads in against them. i was also really lucky with my bosspole rolls, lol. I only had one unit run away, and that was because the nob was dead.Even then, it rallied and helped finish off the deathwing knights. I had hoped to use the deffkoptas to dash about and sieze bjectives but most of the cards i drew were of the kill this/do that type, but they still played their part, a nuisance if nothing else.Unit of the game had to be the shoota mob, with a painboy attached they weathered a lot of flak, and of course, the painboy killed the warlord,samnael. all in all a good game against a great opponnt, but victory went where it belonged, to the orks!!!!
Monday, 23 November 2015
Armies of the Tyrants Part 4: Lizardmen
While I'm on a roll, here's another of mine.
This was my last Warhammer Fantasy army, which I did during over the winter in 2014/2015. A group of us collected new armies, going up 500 points a month and playing progressively bigger games.
I went for people as a colour scheme, as it's a colour which I like and it went well on my Chaos Marines. I've shown them here on regiment bases in the 8th edition formations, as they should be.


This was my last Warhammer Fantasy army, which I did during over the winter in 2014/2015. A group of us collected new armies, going up 500 points a month and playing progressively bigger games.
I went for people as a colour scheme, as it's a colour which I like and it went well on my Chaos Marines. I've shown them here on regiment bases in the 8th edition formations, as they should be.


Saurus Warriors. These are the solid unit in my army, and if I expand the army up above 2000 points I'll be adding another unit.


Skinks with Kroxigors. These guys are nowhere as good as they should be and I'm not really impressed. However I haven't got anything to replace them with yet.


Saurus cavalry. These guys are the hammer unit, and are rock solid especially with the hero in the unit. The cold ones are pretty decent my as well
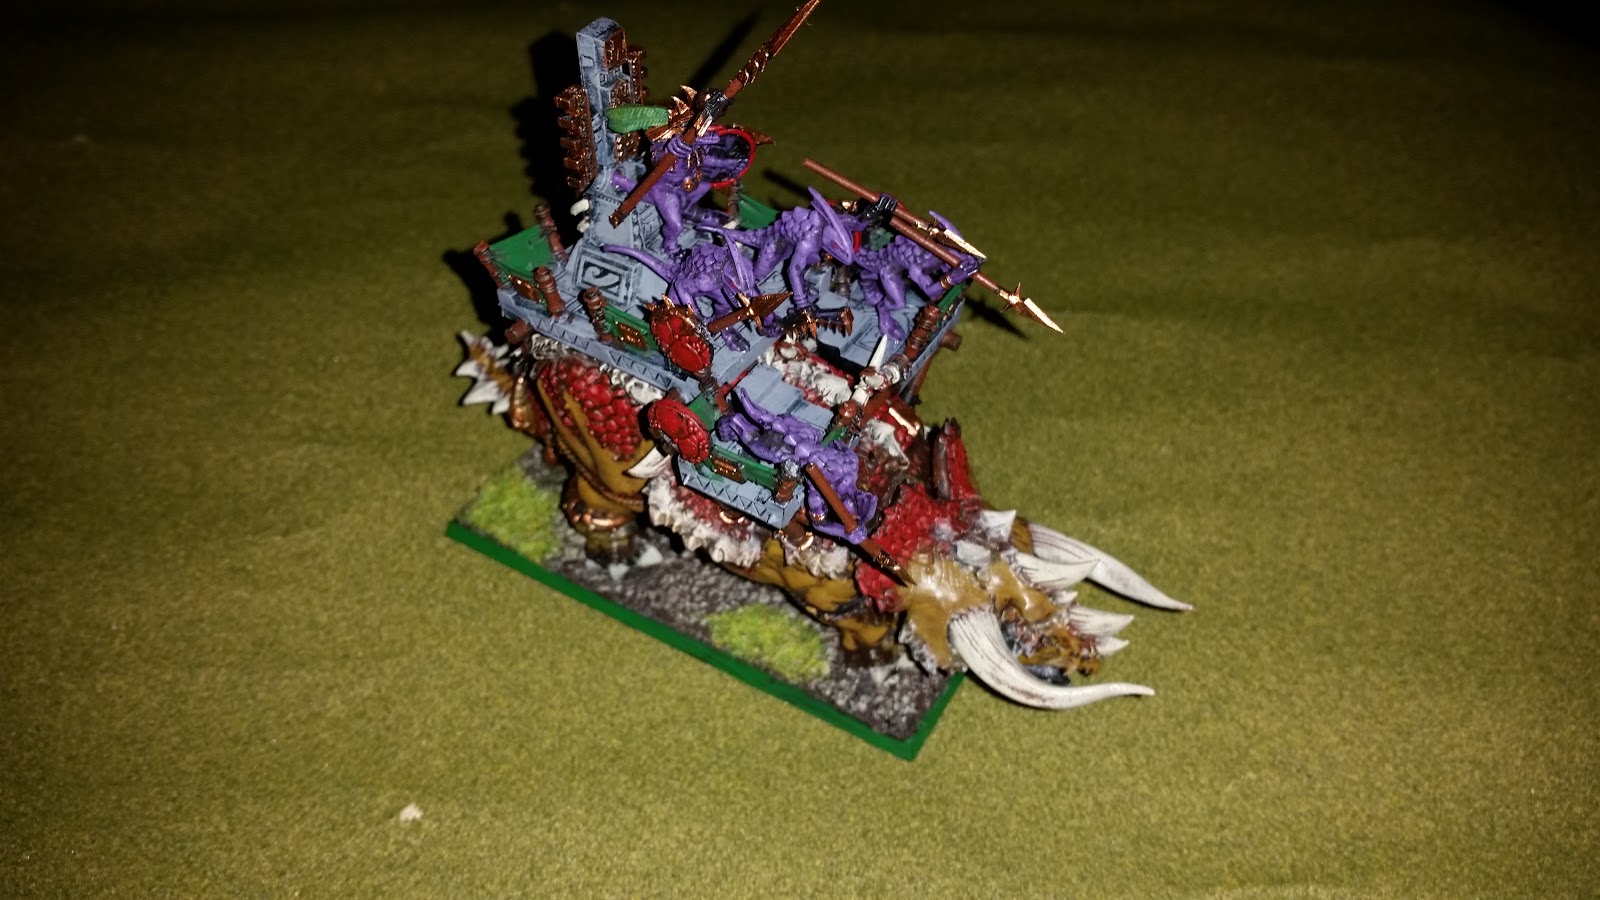

The Stegadon, the staple lizardmen monster. Worked the flesh up to a pale brown with layering and then the armour plates to red. The Skinks are purple to match the rest of the army.

The fearsome Ripperdactyles, a unit I struggled to find a use for. Their best combats were often when they flew into the front of Irongut units. Proper placement of the bloat toad is crucial.
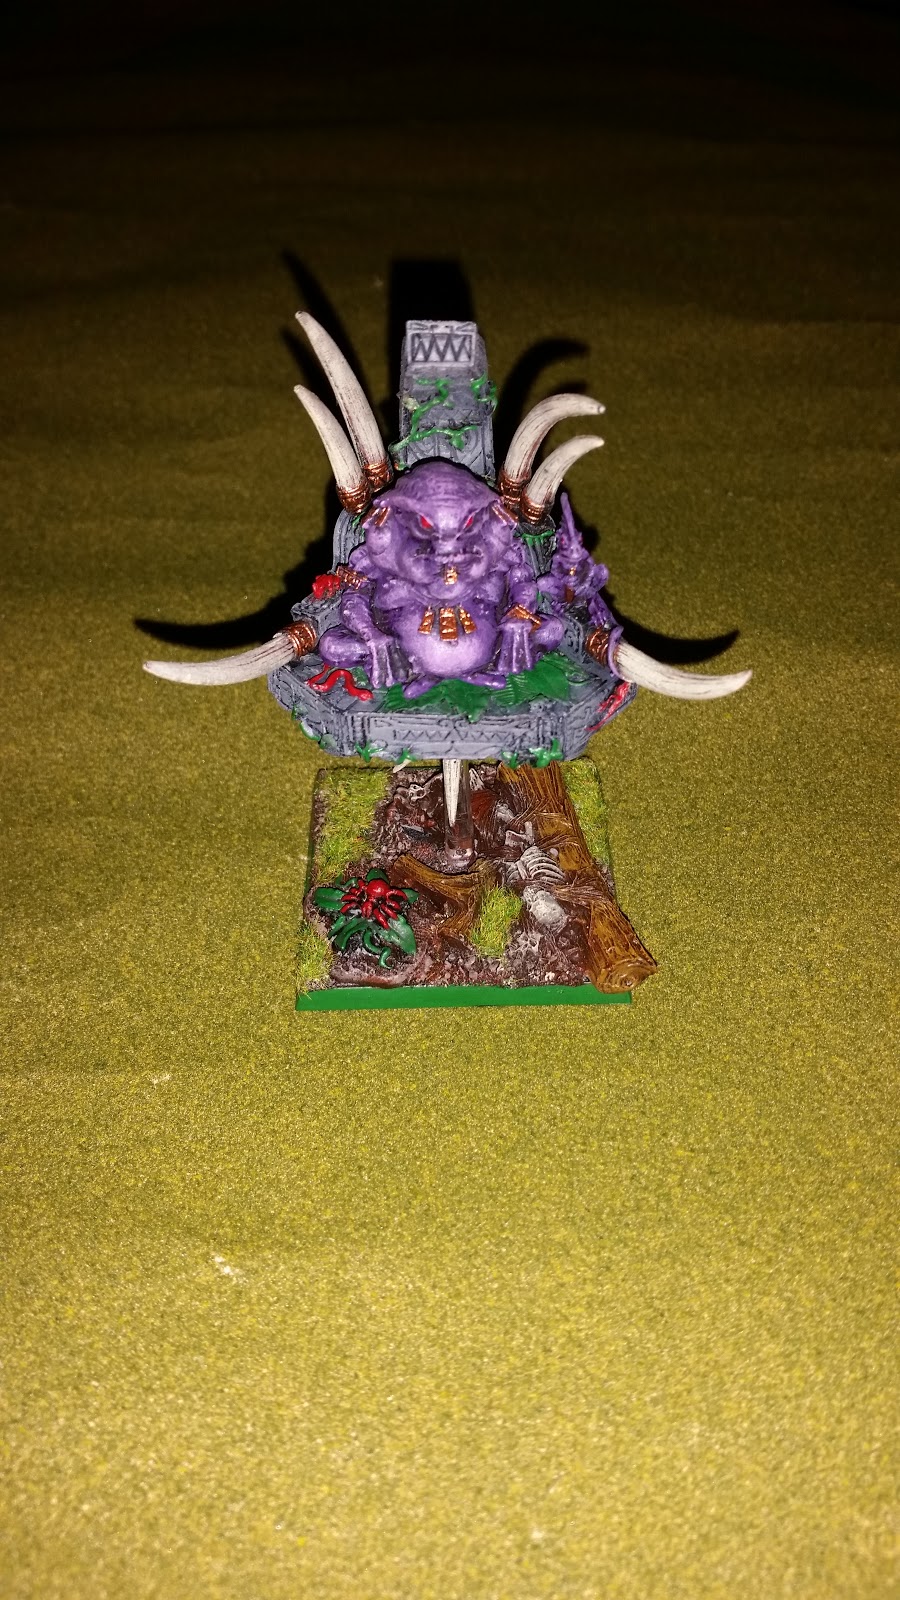
The start of the show, the Slann mage priest. This is a good example of the benefits of Finecast, as this is a model which was way too heavy to be balanced on a flying stand when it was white metal, but as resin is pretty much ideal. The bad details are from the jungle basing kit.
I usually played him as an ethereal, avoiding the need for a temple guard unit.


The rest of my Skinks, serving as a skirmish unit, with the skink priest in the unit. This is a far better use for the little fellas than a ranked unit.
I do miss playing with this army, we're going to have to get back to playing 8th edition fantasy at some point. I'd like to expand the army from 2000 points up to 2400 by adding another unit of Saurus Warriors and a Bastidon but it's not high on the list of priorities.
Any questions? Comments below.
Subscribe to:
Posts (Atom)