Welcome hobbyists and fellow Tyrants! Today I've done a run through on how I've been painting my Iron Warriors! I hope you find it helpful and feel free to leave comments below! Throughout you'll see that I use GW paints but I'm sure any similar colours from other ranges will have the same effect.
For the Iron warriors I started with a black undercoat, I used Auto Extreme matt black but any spray will get the job done.
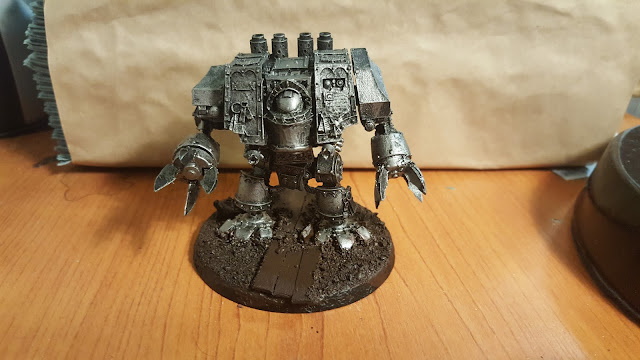
Next I took a large brush and gave the dreadnought a dry brush of Leadbelcher, I made sure to thoroughly cover all the areas I wanted silver. By drybrushing it helps to keep the silver nice and dark, just how you want an evil remorseless killer.
For the start of the base I took a large brush and gave it even helping of Rhinox Hide, making sure to avoid the dreadnought's feet.
I kept hold of that large brush and gave the silver a light dry brush of Ironbreaker, this gives the armour a slightly battered and worn appearance round the edges.
I started off the gold by using a standard brush to apply Retributor Armour. I love this new gold and find it goes on so much better than the other golds produced by GW.
Then I basecoated all the areas I planned to paint hazard stripes on black. I found painting them in different places across the units looks a lot cooler. Elbows, shins, knees and weapons are all great places for the hazard stripes!
Next I masking taped off the stripes, this takes longer than freehanding them but I struggle to keep them neat over larger areas. Here i have used 3mm tape, for larger vehicles I've used both 6mm and 10mm.
I took a standard brush and used Averland Sunset to base coat the yellow.
I then used the standard brush to basecoat the scrolls with Dheneb Stone. You can see here the tape hasn't been entirely effective but don't worry we'll touch that up later.
The wax seals were basecoated Khorne Red using a standard brush.
Next I washed all the hazard stripe areas using Reikland Fleshshade. This starts to build up the dirty effect on them.
I then washed the rest of the model using Agrax Earthshade, again this starts to make it look dirty and builds up the worn and battered effect.
To keep building on the worn look I lined all the silver areas using heavily watered down Mournfang Brown.
To further add to it I used Typhus Corrosion on random patches, this is the perfect base for rust as it creates a rough area.
I then drybrushed over the rough areas using Ryza Rust to really create that rusted look.
Next I applied heavily watered down Nihilak Oxide on to all the gold areas,this weathers it and creates a great looking verdigris effect.
I then went back and neatened up the black ready for doing the hazard stripes.
For the first yellow highlight I used watered down Averland Sunet.
Next I used watered down Yriel Yellow for the final yellow highlight.
Next I used Mournfang Brown to create a chipped and damaged effect on the hazard stripes. I also use the chips to hide any areas where the stripes are not as neat and to hide any mistakes.
I then go over the chips using Runefang Steel but still leaving some of the brown showing.
Khorne red was then used as base on the lenses and as a highlight for the red on the wax seals.
Mephiston Red was used next to highlight all the red areas. I kept it towards the bottom of the lenses.
Next I highlighted all the red using Evil Sunz Scarlet, keeping to the very bottom of the lenses. I then painted the top of the lenses black and added a white dot to finish off the effect.
To finish off the lenses I glossed them and I used pink horror as the final highlight on the wax seals.
I then went on to highlight the scrolls using Dheneb stone.
I used a fine detail brush and watered down black to to add the scripture to the scrolls. I also washed the base using Agrax Earthshade to add some depth to the mud.
Next I took a large brush and drybrushed the mud using Dyrad Bark.
For the final drybrush on the mud I used Gorthor Brown and a large brush.
Next i gave the wood a drybrush of Mournfang Brown.
The final touch is neatening up the base rim using black.
Finnished! There you have them, a completed Iron Warriors Dreadnought Talon red ready to slay the false Emperors lap dogs!


Looks amazing, really nice tutorial!
ReplyDelete